
Lateral Marks: Which Side Do You Leave Them On?
Region A or B, port hand or starboard hand - lateral marks confuse even experienced skippers. Here's how to read them correctly every time.
26 October 2026 · 7 min read · IRPCS crew

Few things produce that quiet, creeping doubt quite like approaching a buoy and realising you are not completely certain which side to leave it on. Lateral marks are the workhorses of the IALA Maritime Buoyage System - they line channels, mark harbour approaches, and guide vessels through estuaries every hour of every day. Yet the Region A / Region B split, combined with the concept of the direction of buoyage, trips up candidates and experienced skippers alike.
This article unpacks lateral marks systematically: what the colours and shapes mean, how to establish the direction of buoyage on any given chart, how Region A and Region B differ, and what to do when you meet a preferred-channel mark. Think of it as a clear mental framework you can reach for when the doubt creeps in.
The Foundation: Direction of Buoyage
Before you can read any lateral mark correctly, you need to know which direction buoyage is running. The IALA system defines the direction of buoyage as the direction a vessel would travel when approaching a harbour, river, or estuary from seaward - or, on a coastwise route, the direction agreed by the relevant authority (broadly, clockwise around continental landmasses).
On an Admiralty chart, the direction of buoyage is shown by a magenta arrow when it is not obvious. In practice, if you are heading up a river towards a port, you are travelling in the direction of buoyage. If you are heading out to sea, you are travelling against it - and the colours on every lateral mark flip meaning accordingly. Getting this orientation right is the single most important step, so check your chart before you check the buoy.
Region A and Region B: The Key Difference
The IALA system divides the world into two regions, and the colour convention for lateral marks reverses between them.
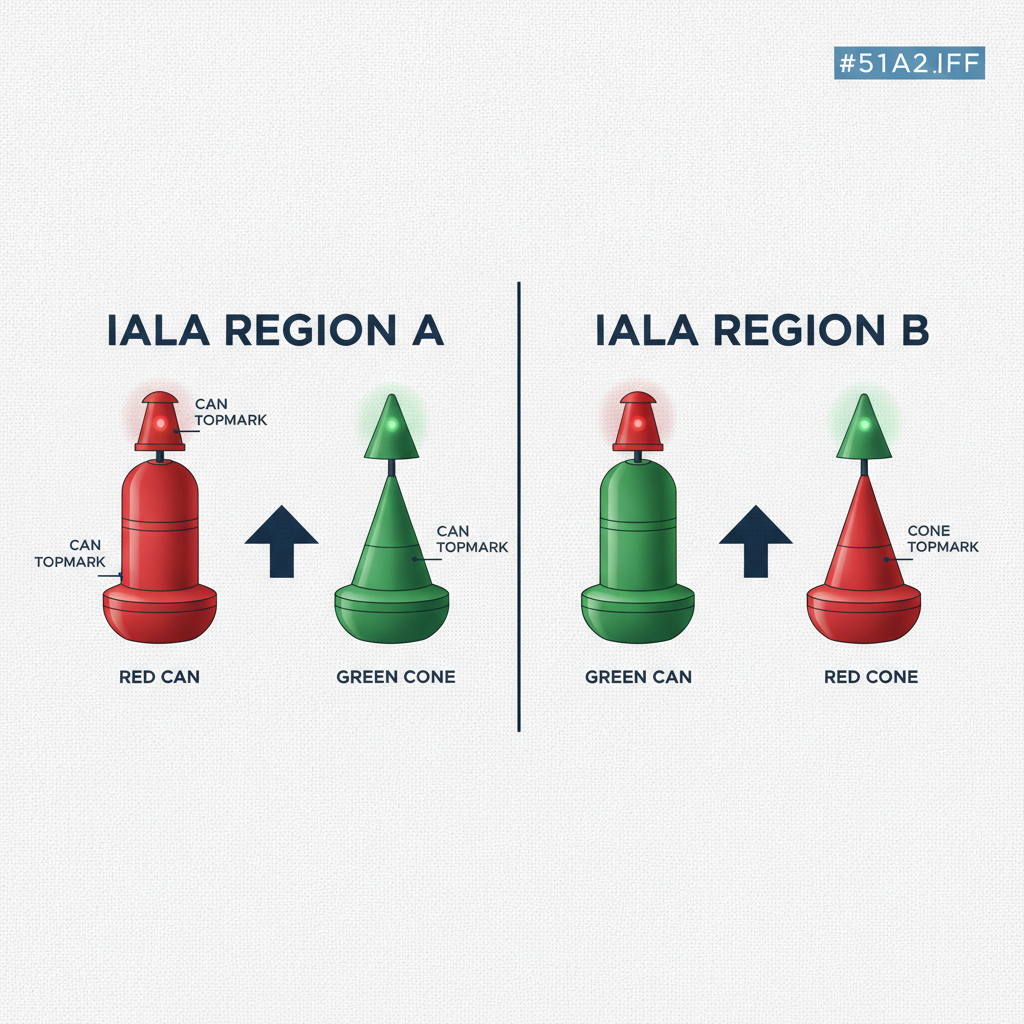
Region A covers Europe, Africa, most of Asia, Australia, and New Zealand. In Region A, port hand marks - those you leave to port when travelling in the direction of buoyage - are red. Starboard hand marks, left to starboard, are green.
Region B covers the Americas, Japan, South Korea, and the Philippines. Here the colours swap: port hand marks are green and starboard hand marks are red.
A useful mnemonic for Region A is "Red Right Returning" reversed - in Region A you put red to port on the way in. For Region B the phrase is "Red Right Returning" itself: keep the red marks to starboard as you return to harbour.
If you cross from one region to another - sailing from the US East Coast to Europe, for example - buoy colours will change at the boundary. Your chart folio and pilot book will flag this, but it is worth keeping firmly in mind whenever you are passage-planning across that divide.
Shape and Topmark
Colour is the primary identifier, but shape and topmarks provide a crucial backup - especially at night or in reduced visibility when colour can be hard to judge.
In both regions, port hand marks are can-shaped (flat-topped cylinders). Starboard hand marks are conical (pointed tops). These shapes are consistent regardless of region, so if the colour is ambiguous, the silhouette of the buoy gives you a reliable second check.
Topmarks, when fitted, reinforce the same message: a single can for port hand, a single cone (point up) for starboard hand. On lit marks, port hand characteristics in Region A are typically red lights and starboard hand characteristics are green - again reversing in Region B. Light rhythm is not standardised to side, so do not rely on it for identification; use colour, shape, and topmark.
Preferred-Channel Marks
Where a channel divides and one branch is considered preferable, the IALA system uses a modified lateral mark known as a preferred-channel mark. These are sometimes called junction marks or modified lateral marks.
A preferred-channel mark has a banded colour scheme rather than a solid colour:
- A mark with a red body and a green band (Region A) indicates that the preferred channel lies to starboard - leave the mark to port.
- A mark with a green body and a red band (Region A) indicates that the preferred channel lies to port - leave the mark to starboard.
In Region B, apply the same logic but with colours reversed for port and starboard throughout.
The topmark on a preferred-channel mark always matches the colour of the widest band (the base colour of the body). So a red-over-green mark carries a red can topmark; a green-over-red mark carries a green cone topmark. This topmark is your quickest clue when approaching from any angle.
The word "preferred" is important. The other channel is not necessarily impassable - it simply has less depth, a tighter bend, or some other reason the authority considers it secondary. Your pilot book or local knowledge will tell you how navigable it actually is.
For a deeper look at all the buoyage categories - cardinal, isolated danger, safe water, and special marks - the IRPCS rule library at /#learn is a good companion to this article.
Putting It Together: A Decision Checklist
When you sight a lateral mark, run through these four steps in order:
- Establish the direction of buoyage. Are you heading into or out of the harbour? Check the chart for the magenta arrow if in any doubt.
- Identify your region. Region A or B? This sets the colour convention.
- Read colour, then shape. Red or green body? Can or cone silhouette? Topmark if visible?
- Check for banding. Is it a preferred-channel mark? If so, which colour is dominant and what does that tell you about the preferred channel?
Those four questions take seconds, and they will not let you down.
Practice Makes Permanent
Understanding the logic is one thing; applying it quickly under exam conditions or on a busy approach is another. The practice quiz at /#quiz includes scenario-based lateral mark questions set in both regions, with immediate feedback. Running through a set of those drills before an exam - or before transiting an unfamiliar system - is time well spent.
FAQ
If I am travelling against the direction of buoyage, do the marks change? The marks themselves do not change - they are fixed to the seabed. What changes is your interpretation. A red can that you leave to port on the way in must be left to starboard on the way out. The physical mark is identical; your relative orientation to the direction of buoyage is what reverses. Keep this in mind when leaving harbour: the channel that looked like green-on-the-right coming in is now green-on-the-left going out (in Region A).
How do I tell Region A from Region B on a chart? Admiralty charts and most commercially produced charts include a note identifying the buoyage region in the title block or in the chart notes. Your pilot book will also state it explicitly. The IALA website publishes a world map of the boundary, and it is worth a quick glance during passage planning any time you are approaching an unfamiliar area or crossing between ocean basins.
Can a preferred-channel mark have a light? Yes. Lit preferred-channel marks use a composite group-flashing characteristic - written as Fl(2+1) - in the colour that matches the dominant body colour of the mark. So a Region A red-over-green preferred-channel mark would show Fl(2+1)R. This is a clear signal on a chartplotter or in the light list and helps you distinguish the mark from a plain lateral at night.
Do the shape rules ever have exceptions? In practice, yes - minor buoys in small harbours are sometimes simplified to posts, spar buoys, or perches that carry only a coloured topmark. The topmark (can or cone) remains the reliable identifier in these cases. Always cross-reference with the chart: every lateral mark is symbolised with its colour, and the chart is your ground truth when physical appearance is ambiguous.
Drill it until it's instinct.
The IRPCS app turns every rule on this blog into adaptive quizzes, drills, and mock exams - free to start.